[ Posted on February 19, 2016 by Sophia Bielenberg - reprinted with permission. Check out the High Mowing blog here! ]
 Potatoes are a simple, fun crop to grow and can help you eat local year-round thanks to their impressive shelf life. In addition to choosing the right varieties for your needs, it’s also important to choose a successful growing method.
You can find information about all sorts of different techniques on the internet these days, from growing in stacked wooden boxes to wire cages filled with straw. But a lot of these methods just aren’t worth their salt and can result in disappointing yields, even with extra love and care. We’re all about helping you succeed, so in this article we’re just going to focus on methods that really work.
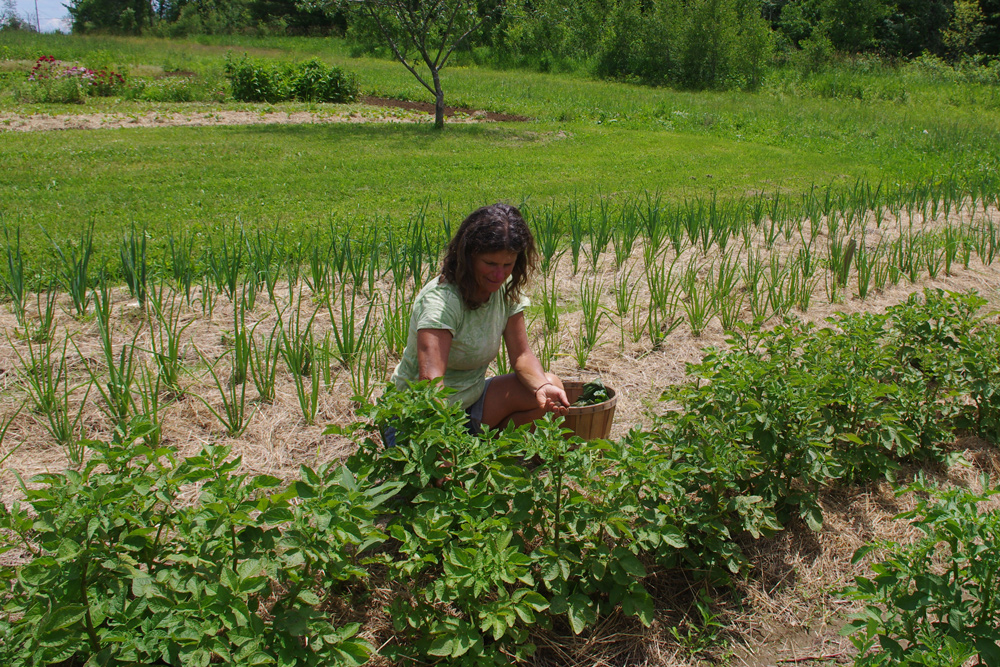
Hills. This is the traditional method that our parents and grandparents used, and it’s the most practical for large plantings. To succeed, you need to prepare an area by tilling or turning and raking the soil so that it’s soft and loose. If your soil hasn’t been amended recently, you’ll want to mix in some compost as well. Once the soil is prepared, dig long, straight trenches 3-5 feet apart (more space means more potatoes), then space your seed potato pieces about 12” apart in the trenches. Cover the seed potatoes with about 4” of soil, then water in well. When the potatoes have sprouted and grown foliage about 8” tall, you should begin “hilling” the plants by mounding the fluffy soil on either side of the trenches up around the stems of the plants. As long as there is some foliage sticking out they’ll keep growing, and the more you hill, the more potatoes you’ll get. It’s important to keep hilling throughout the season, since any tubers lying close to the soil surface will turn green if they become exposed to sunlight.
You can mulch your hills with straw if you like, which conserves water and makes it harder for potato beetles to move around, but it does get in the way when hilling. If you use straw, leave it in flakes rather than fluffing it up—this way it makes a solid weed barrier and can be gathered and stacked in a neat pile while you’re hilling.
Raised Beds. Growing potatoes in raised beds, whether they’re simply mounded or have actual frames, is one of the easiest and most productive methods. You don’t need to till every year, which is better for maintaining soil structure and health, and you can plant earlier since you don’t need to wait to till before planting. Since potatoes produce best in cool soil that is 40-60°F, most people will have better results with crops planted early in the season, though this is more flexible in cool climates.
To succeed, start by mixing some compost into the soil, then dig shallow trenches about 6” deep and 2-3 feet apart in your raised beds, plant your seed potatoes in the trenches about 10” apart, then cover with 4” of soil. Just like with planting in the ground, you should begin hilling the plants when they get about 8” tall, and continue hilling as the plants grow to give the tubers plenty of room to size up.
To harvest from hills or raised beds, wait until about one week after the plants have completely died back, then pull them up by the stems and remove any potatoes that are attached to the roots. Once the plants have been removed from the bed, you can use a spade or garden fork to dig up the rest of the potatoes. Alternatively, you’re less likely to accidentally spear your spuds if you invite some friends over to help you sift through the soil by hand. It’s a dirty job, but if you feed your helpers in return (or remind them that soil microbes are natural anti-depressants), they won’t mind so much.
Containers, Stacking Boxes or GrowBags. One of the biggest advantages of growing in pots, boxes or bags is the ease of harvest – you just dump out the container and collect your potatoes. The yields from containers can be as good or better than from hills or raised beds, since there’s a large volume of soil held around the plants, and they grow vertically in this system, which also takes up less space. To succeed, select a large container (3-10+ gallons) with plenty of drainage holes, and add about 3” of potting soil. Place your seed potatoes in the bottom of the container, then cover with 4” more soil and water in. Add more soil to the container as the plants grow, until the soil is 1” below the top rim of the container. You can alternate “hilling” with potting soil and garden soil to keep cost down, just don’t use only garden soil (see below), and be sure to water your containers every morning that it isn’t raining.
Methods I Do Not Recommend Because They Stress the Plants & Reduce Yields:
- Planting in straw (I find that the plants dry out, but this may work in high-rainfall areas)
- Planting in wire cylinders full of straw, compost or soil (there is too much airflow so the plants dry out, resulting in undersized tubers)
- Planting in plastic bags or other containers with poor drainage and airflow. Food-grade plastic tubs with drainage holes can be used, but clear and dark-colored tubs tend to heat the soil too much and can reduce yields
- Planting upside down, grafted to tomato plants or other boutique methods that are more like fun science experiments than successful production techniques
5 Common Mistakes to Avoid:
Starting Too Late. If you’re located anywhere except the cool North or mountain states, there’s not much point in planting potatoes in June. The soil is already too warm and yields will be disappointing. However, you may still be able to produce a fall crop by planting in an area with afternoon shade, where the soil stays cooler, and fall crops may avoid the worst damage from Colorado Potato Beetles.
Letting Plants Dry Out. This is an issue in areas with sandy soil and in hot environments like containers, rooftops and urban heat islands. Water thoroughly every morning in these situations, and hire a plant-sitter if you’ll be going away. Plants that have wilted will have reduced yields.
Using the Wrong Soil. Generally potatoes grow best in deep, loose, loamy soil that is not too rich – 2 parts garden soil to 1 part compost is a good mix for hills and raised beds. If your soil is compacted or you till too shallowly, your plants won’t have enough soil to grow in and yields will be low. If you plant in containers, you need to use potting soil because garden soil hardens in pots, making it harder for tubers to form.
Not Enough Drainage. All potatoes prefer good drainage, so it’s best to choose a spot that doesn’t flood, even in rainy seasons. This is unavoidable in some years, but drainage ditches, raised beds, containers or aggressive hilling can keep the plants above water in extreme situations.
Too Many Seed Potatoes. The amount of loose soil you provide, not the number of seed potatoes you plant, is the main factor that will limit yields. Crowding the plants will generally result in lower yields, not higher ones, so give each potato piece the space and soil it needs to thrive.

